
Introduction – Why 3D Printing Still Feels “Complicated”
Have you ever looked at a sleek 3D-printed product and thought: “That looks amazing—but I could never figure out how to make it myself”? You’re not alone. Many businesses, hobbyists, and designers feel overwhelmed by the 3D printing process—jargon like FDM, SLA, SLS makes it sound technical, while the actual steps seem hidden behind experts’ walls.
The good news? Understanding the 3D Printing Process is far simpler than it appears. Once you know the flow—from design, to printing, to post-processing—you’ll see why it’s become a game-changer in manufacturing, prototyping, and even creative industries.
In this article, let’s break it down step by step. We’ll explore the most popular methods, the workflow, common pitfalls, and even some handy software that makes life easier. Stick around till the end—we’ve even got a recommended video to help you visualize the process.
Overview of Popular Processes: FDM, SLA, SLS
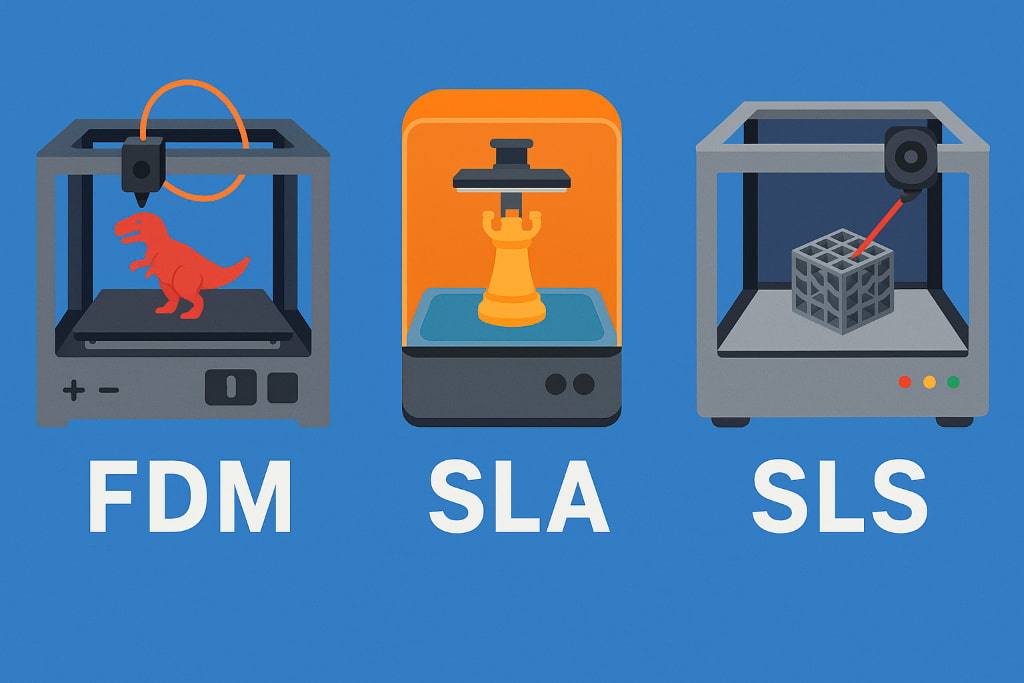
Not all 3D printing is the same. The “printing process” varies depending on the technology used. Here are the three most common ones:
1. FDM (Fused Deposition Modeling)
The most popular and affordable method.
Works by extruding melted thermoplastic filament layer by layer.
Great for prototypes, functional parts, and low-cost projects.
(If you’re based in Chennai and looking for FDM 3D Printing Services, check out Arsene3D.)
2. SLA (Stereolithography)
Uses liquid resin cured by a UV laser.
Delivers smooth finishes and high precision.
Perfect for jewelry, dental models, and highly detailed designs.
3. SLS (Selective Laser Sintering)
Uses a laser to sinter powdered material (like nylon).
Strong, durable, and doesn’t need support structures.
Ideal for industrial-grade parts and complex geometries.
Relatable Story: Imagine you’re designing a new product prototype. With FDM, you can test it quickly and cheaply. If you need investor-ready, polished models—SLA is your friend. And if you’re building something durable, like machine parts, SLS is the way to go.
Step-by-Step Workflow of 3D Printing
 So, how does it all actually work? Here’s the workflow of the 3D printing process in plain English:
Designing the Model
Start with a CAD file (Computer-Aided Design).
Tools like Fusion 360, Blender, or TinkerCAD make this step easier.
Slicing the Model
Specialized software (called a slicer) converts the 3D file into printable layers.
Popular slicers: Cura, PrusaSlicer, Simplify3D.
Printing the Model
The printer builds the object layer by layer.
This can take anywhere from 30 minutes to 20+ hours depending on size and detail.
Post-Processing
Removing supports, sanding, curing, or painting the part.
This is where a “rough print” becomes a final product.
Testing and Iteration
Most designs go through tweaks and reprints before hitting perfection.
Post-Processing Techniques
A freshly 3D-printed object isn’t always ready to use. Post-processing steps vary depending on the method:
FDM prints – Sanding, acetone smoothing, painting.
SLA prints – Washing in isopropyl alcohol, UV curing, polishing.
SLS prints – Powder removal, dyeing, surface coating.
👉 Pro tip: Don’t skip this stage. The difference between “plastic-looking” and “professional finish” comes from post-processing.
Common Mistakes to Avoid in 3D Printing
Even experts get it wrong sometimes. Here are mistakes beginners often make:
Skipping bed leveling → Causes prints to peel off mid-way.
Wrong slicer settings → Leads to weak prints or wasted material.
Not drying filament → Moisture ruins print quality.
Ignoring design rules → Overhangs and thin walls cause failure.
Rushing post-processing → A good finish takes patience.
If you’d like a deeper dive into design mistakes, check this external guide from All3DP.
Software Tools That Make 3D Printing Easier
Don’t worry—you don’t need to be a pro to design or print. Some tools simplify the entire workflow:
TinkerCAD – Beginner-friendly, web-based CAD.
Fusion 360 – Professional-grade CAD with engineering precision.
Cura / PrusaSlicer – Best free slicers with powerful features.
Meshmixer – Fixes broken 3D models quickly.
External Resource: Autodesk’s Fusion 360 is a great starting point for serious designers.
Video Suggestion 🎥
Want to see the process visually? Check out this explainer video on FDM vs SLA vs SLS Printing on YouTube.
Conclusion – Streamlining Your 3D Printing Process
At its core, understanding the 3D printing process isn’t as intimidating as it sounds. Whether you’re using FDM for quick prototypes, SLA for high-detail models, or SLS for durable parts, the workflow follows the same path: Design → Slice → Print → Post-Process → Refine.
By avoiding common mistakes, using the right software tools, and learning from pros, you can dramatically speed up your journey from idea to final product.
🚀 Ready to try it yourself? Connect with Arsene3D for expert help in:
3D Printer Sales
FDM 3D Printing in Chennai
SLA Printing in Chennai
3D Designing & Filaments
📞 Call us at +91 96295 95638 or 📧 mail us at sales@arsene3d.com
👉 WhatsApp Us